

What Is Included in a Professional Kitchen Cabinet Painting Project in Orlando, FL?
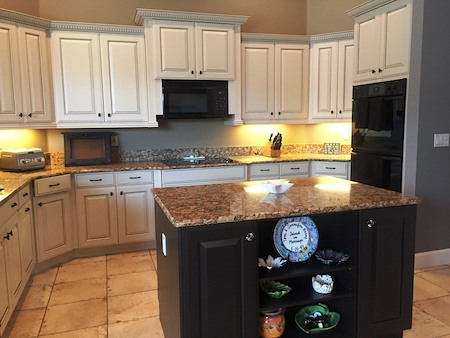
Thinking about refreshing your kitchen without a full remodel? A professional cabinet repaint can change the look and feel of your home from Lake Nona to Winter Park. Here is exactly what a complete, start-to-finish service includes when you hire Repaint Florida LLC for kitchen cabinet painting in Orlando, FL.
What To Expect From Start To Finish
A successful project is organized, predictable, and respectful of your home. You should see a clear plan, consistent communication, and workmanship that stands up to Central Florida humidity and daily use.
Step 1: On-Site Consultation And Color Planning
Every home is different. During an in-home visit, your project lead listens to your goals, checks cabinet material and current coatings, and notes items like crown molding, glass doors, and island panels. We discuss finish sheen, color placement, and light reflection in spaces from Baldwin Park townhomes to larger Dr. Phillips kitchens.
You also get a written plan for sequence, access, and daily cleanup. If you are deciding between warm whites or deeper tones, we review sample boards and talk about how Orlando’s bright sun can shift how colors read during the day.
Step 2: Detailed Protection And Kitchen Preparation
A professional project protects the home so the work feels controlled, not messy. Floors, counters, appliances, and nearby rooms are sealed and masked before any sanding or spraying begins. Vent covers are protected to keep dust from moving through the home, and pathways from the door to the kitchen are wrapped for safe traffic.
- Floors get ram-board or heavy drop cloths
- Counters, backsplash, and sinks are poly-wrapped
- Appliances and fixtures are covered and taped tight
- Doorways and returns are sealed to control dust
- Hardware is bagged and labeled for clean reassembly
We map a staging area for doors and drawer fronts so the finish can be applied in a clean, efficient zone, often in a garage or a ventilated area that keeps your living space comfortable.
Step 3: Cleaning, Deglossing, And Surface Repairs
Cabinets live at the center of cooking. That is why oil and grease removal is essential before any primer touches the surface. Your team uses professional cleaners and deglossers to cut residue that would otherwise block adhesion.
After cleaning, we fill dents, tighten loose hinges, and repair minor veneer issues. Dings along island corners and lazy-susan edges are common in busy family kitchens from College Park to Conway. These areas get sanded smooth so the final coat looks even and crisp.
Step 4: Adhesion Priming That Blocks Stains
The primer is the backbone of the system. We apply a bonding primer made for cabinets and hard-use trim. This creates a uniform surface so the color lays down smooth and consistent. On knotty or previously stained wood, stain-blocking primers keep tannins from bleeding through light paint colors.
Proper bonding primer prevents peeling and makes the topcoats look richer. Edges, profiles, and door rails get careful attention so the finish does not look thin where hands touch most.
Step 5: Professional Spraying Or Brushing For A Factory-Smooth Finish
Cabinet doors and drawer fronts are coated in a controlled area with pro sprayers or fine-finish rollers and brushes, depending on your home and ventilation needs. Frames are finished in place with the kitchen fully masked. We use a multi-coat system with measured dry times between coats, adjusted for Orlando’s climate.
Our goal is a smooth, consistent finish with accurate color. Sheen choices often include matte, satin, or semi-gloss. Satin is popular in Central Florida because it resists fingerprints while staying cleanable.
Step 6: Curing, Reassembly, And Hardware Upgrades
Once the finish is applied, doors and drawer fronts cure on racks to reduce handling marks. Frames cure with temperature and airflow managed by your home’s HVAC system. In wetter months, we allow additional time so the coating sets properly.
Everything is reassembled with labeled hardware. If you are upgrading to new pulls or soft-close hinges, we align and install them with clean pilot holes and careful measuring. Shelves go back in, bumpers are added to doors, and glides are checked for smooth operation.
Local insight: Orlando humidity rises fast in summer afternoons. A professional crew may schedule coating windows earlier in the day and monitor indoor humidity so your finish levels beautifully and cures as expected.
Quality Control And Final Walkthrough
Before we call it complete, a lead finisher inspects sheen consistency, edge coverage, and touch points around pulls and hinges. Any micro-bubbles or dust nibs are corrected. Doors are adjusted for even gaps, and soft-close hardware is tuned so drawers glide quietly.
- Sheen and color checked in natural and artificial light
- Edges, corners, and profiles inspected for coverage
- Doors and drawers aligned and adjusted
- Work areas cleaned and masking removed with care
We review care guidelines with you and answer questions about cleaning and normal cure behavior. That includes how the finish hardens over time and what to expect during the first days of use.
How Scheduling And Duration Work In Orlando
Project timing depends on kitchen size, number of doors and drawers, and seasonal humidity. Many Orlando homes are completed within a tight window, with added cushion in the wet season for proper cure and ventilation. Homes in shaded lots or with efficient HVAC can sometimes move faster than bright, sun-soaked spaces that retain heat.
We coordinate with your calendar so meal prep stays simple. Appliances remain masked as briefly as possible, and we plan daily cleanup so you can safely move through the kitchen in the evening.
Finishes And Sheens That Perform In Central Florida Kitchens
Your lifestyle guides the finish recommendation. Families with young kids often choose a washable satin. Entertainers who want a sleek look may opt for semi-gloss on island panels and a softer sheen on uppers to balance light.
- Matte: low reflection that hides minor surface variations
- Satin: smooth feel with easy cleaning in busy kitchens
- Semi-gloss: durable, lively look on islands or accent doors
- Two-tone schemes: light uppers with a deeper island for contrast
We also review how hardware finish and under-cabinet lighting affect the final look. Brushed brass against warm whites or black pulls on a deep navy island can create a strong focal point.
What Cabinet Painters Do Behind The Scenes
Professionals spend more time preparing than painting. That is why results look “factory” and feel durable. Labeled hardware bags, dust control, daily cleanup, and proper staging are quiet details that protect your home and shorten the path to a beautiful finish.
Your crew keeps a running punch list and documents color formulas and sheen. This record makes future touch-ups simple if you update a pantry door or add new trim later.
Care And Maintenance After The Pros Leave
Cabinet coatings continue to harden after installation. Control indoor humidity during curing with normal air conditioning and gentle airflow. Use mild cleaners and soft cloths. Avoid scrubbing pads that can dull the sheen.
Place felt pads under frequently moved items and use clean hands when opening doors for the first few days. Avoid heavy use until the finish fully hardens, which depends on temperature and moisture levels. Your project lead will explain what to expect based on the season.
When Cabinet Modifications Make Sense
Sometimes a small change unlocks a better layout. If you want to swap a double-door base for full-extension drawers or add a trash pull-out, we can coordinate simple carpentry before paint so the whole kitchen looks seamless. Explore options like door style changes or new end panels on our cabinet modifications page to see what pairs well with a fresh finish.
Related Resources To Explore
If you enjoy learning about process and care, browse our latest notes and how pros think through sequence and surfaces in the cabinet painting tips section. It is a helpful companion when planning your project timeline around school or holiday schedules.
Why Choose Repaint Florida LLC In Orlando, FL
Local homes in neighborhoods like Maitland, Hunters Creek, and Belle Isle face heat, sun, and moisture. We build our process around those conditions and bring clear planning to every project. From first sample to final walkthrough, our goal is to protect your home, respect your time, and deliver a smooth, consistent finish.
If you are comparing options, start with a team that takes prep and curing seriously. You can learn more about our approach to professional kitchen cabinet painting and see how a proven system adds lasting value to a busy Central Florida kitchen.
What Is Included In A Professional Cabinet Painting Project
Here is a quick summary of what is covered when you hire a pro in Orlando:
Planning and sample review, full protection of floors and counters, careful label-and-remove of doors and hardware, deep cleaning and deglossing, sanding and repairs, bonding and stain-blocking primers, multiple finish coats with measured dry times, climate-aware curing, clean reassembly with hardware alignment, quality inspection, and a final walkthrough with care guidance. That is the professional difference you see and feel every day at breakfast.